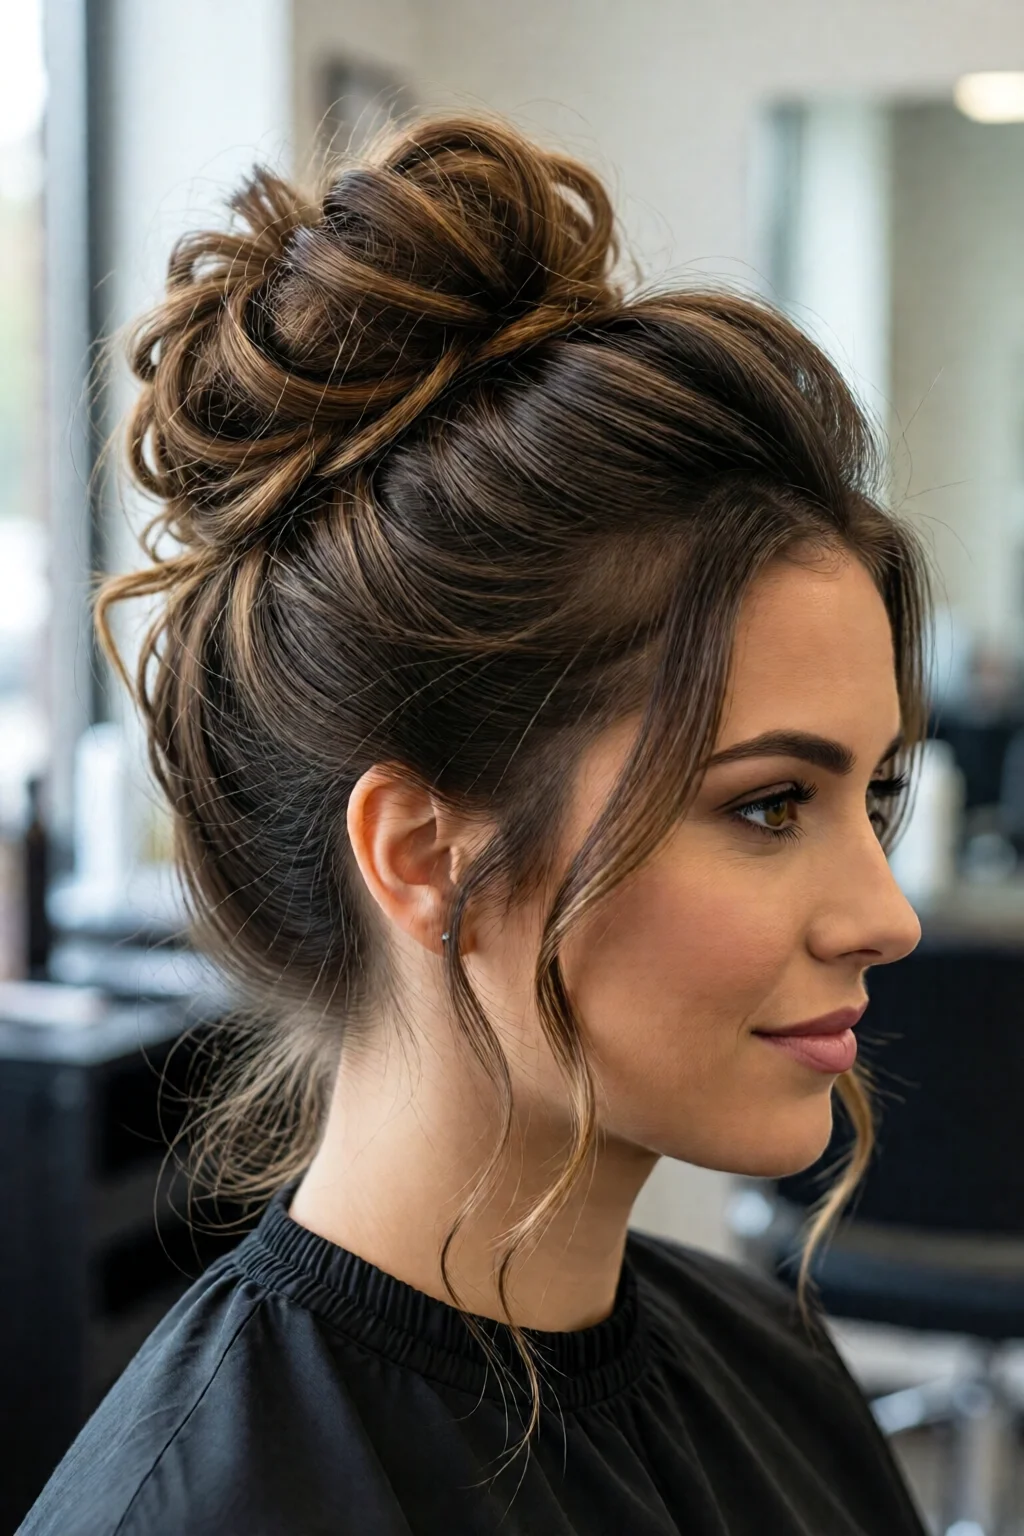
Master the twisted updo hairstyle tutorial that turns everyday hair into runway-ready elegance in under 30 minutes.
In This Article
In this guide you’ll learn exactly how to twist, pin, and polish a sophisticated updo that works for weddings, office presentations, or a night out. By the end you’ll have a repeatable method, the exact products I keep on my styling cart, and the confidence to adapt the look to any hair length or texture.
What You Will Need or Before You Start
- Heat protectant spray – TRESemmé Thermal Creations Heat Tamer Spray, 8 oz, $5.99.
- Flat iron (if you need to straighten stubborn curls) – Conair Double Ceramic Flat Iron, 1‑inch plates, $49.99.
- Two sizes of hair elastics – 1‑inch “no‑slip” bands (Scunci, $4.99 for a pack of 3) and ½‑inch elastic for tighter twists.
- 15‑20 invisible hairpins – Invisible Hairpins set of 30, $6.99.
- Finishing spray – Oribe Gold Lust Dry Shampoo, 2.5 oz, $44 (works as a light hold and adds shine).
- Optional accessories: a pearl‑studded hair comb ($12) or a sleek metal hair claw (claw clip hairstyles ideas and tutorials, $9.95).
- A fine-tooth comb, a wide‑tooth brush, and a spray bottle filled with lukewarm water.
Step 1: Prep Your Hair
Start with freshly washed hair that’s still damp (about 70% moisture). I recommend the how to get voluminous blowout at home routine: towel‑dry, apply a dime‑size amount of heat protectant, then blow‑dry using a 20‑mm round brush at 180°F. The goal is to create a smooth canvas without flattening natural body. For thick hair, I use the highest heat setting (450°F) for 10 seconds per section; for fine hair, stay below 350°F to avoid breakage.
Once dry, lightly mist the hair with water to reactivate the product, then comb through to eliminate any flyaways. If you have a money piece (see money piece hair color trend) that looks lighter, this extra moisture helps the color blend into the updo rather than appearing as a stark highlight.
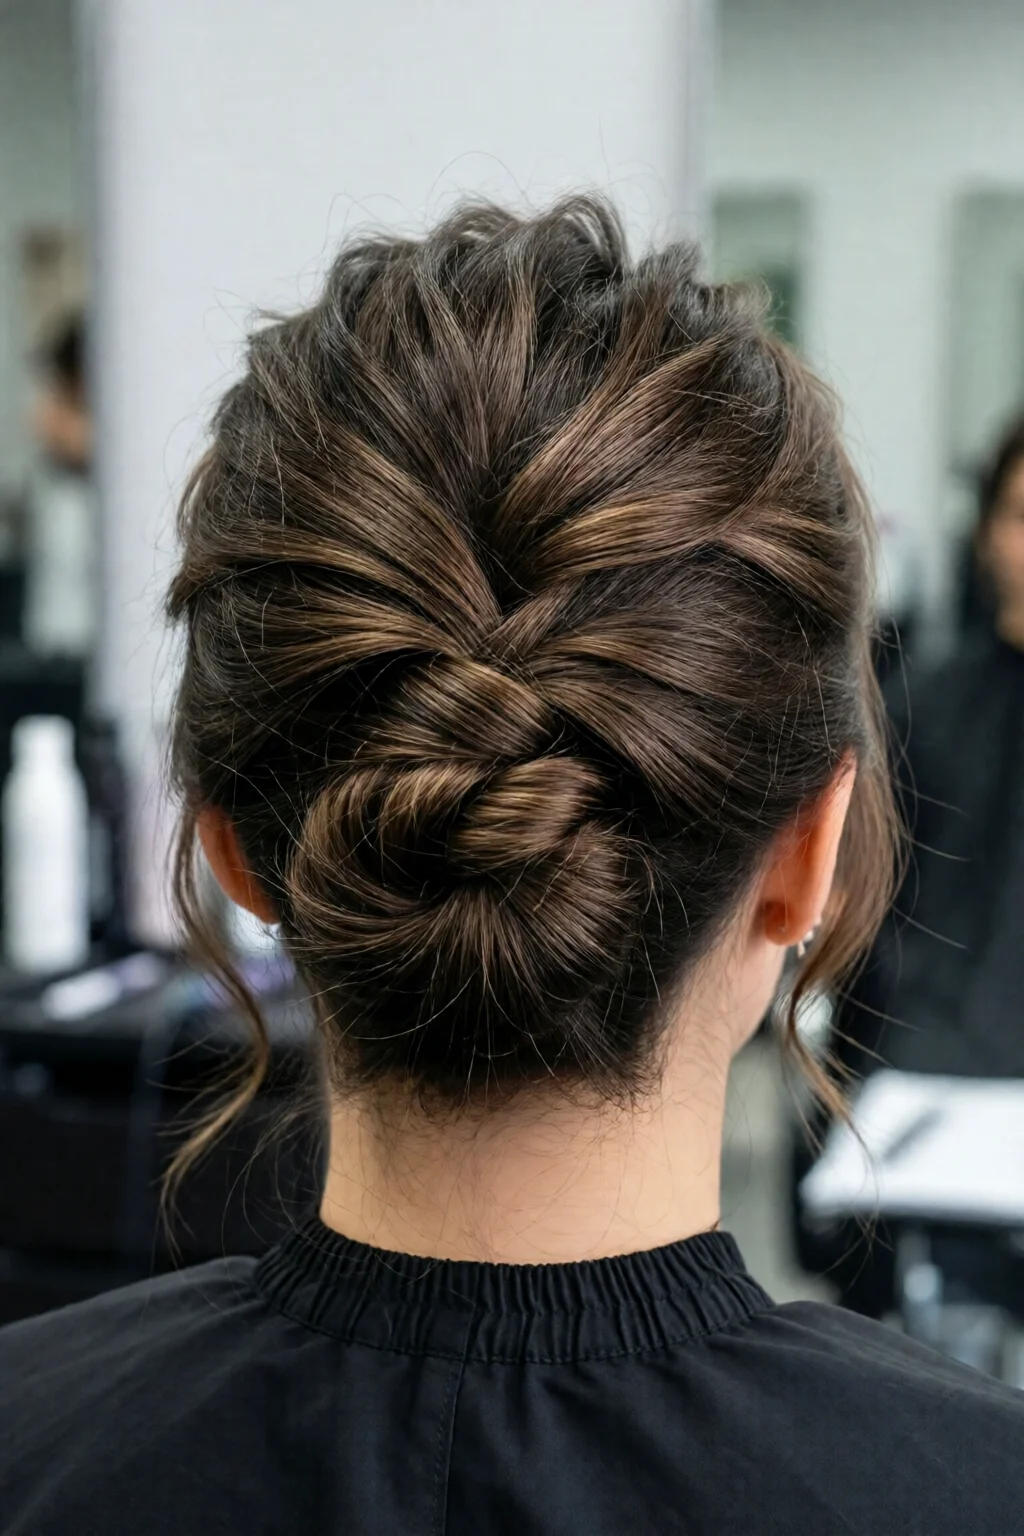
Step 2: Create the Base Twists
This is the heart of the twisted updo hairstyle tutorial. Divide the hair into three horizontal sections: a top “crown” band (about 2‑3 inches wide), a middle “half‑up” band, and a lower “base” band. Secure the lower band with a ½‑inch elastic; you’ll untie it later for the final wrap.
Take a 2‑inch strand from the left side of the crown section, twist it tightly toward the back, and pin it with an invisible hairpin just below the scalp. Mirror the motion on the right side. Continue alternating left‑right twists until the entire crown is a series of interlocking spirals. I find that using a 1‑inch hair elastic to hold each mini‑twist in place while you work speeds up the process by about 30%.
When the crown twists are complete, gently tug each coil outward to create volume. If you notice any loose ends, secure them with an extra pin – this prevents the updo from unraveling later.

Step 3: Gather and Secure the Crown
Gather the twisted crown and the half‑up band together as if you were making a low ponytail, but keep the twists exposed. Hold the bundle at the base of the skull and twist the entire mass clockwise for 2‑3 seconds. This extra rotation adds tension, which is the secret to a sleek, long‑lasting updo.
Secure the twisted bundle with a 1‑inch no‑slip elastic. For added grip, wrap the elastic twice around the base. Then, using a fine‑tooth comb, smooth any stray hairs around the hairline. If you have fine hair, spray a light mist of water and press the comb through to set the shape.
Now, take the lower band you set aside in Step 1, pull it up, and wrap it around the base of the ponytail, tucking the ends under the elastic. Hide the elastic with a few extra invisible pins. This “wrapped” technique adds a polished finish that mimics a professional salon look.
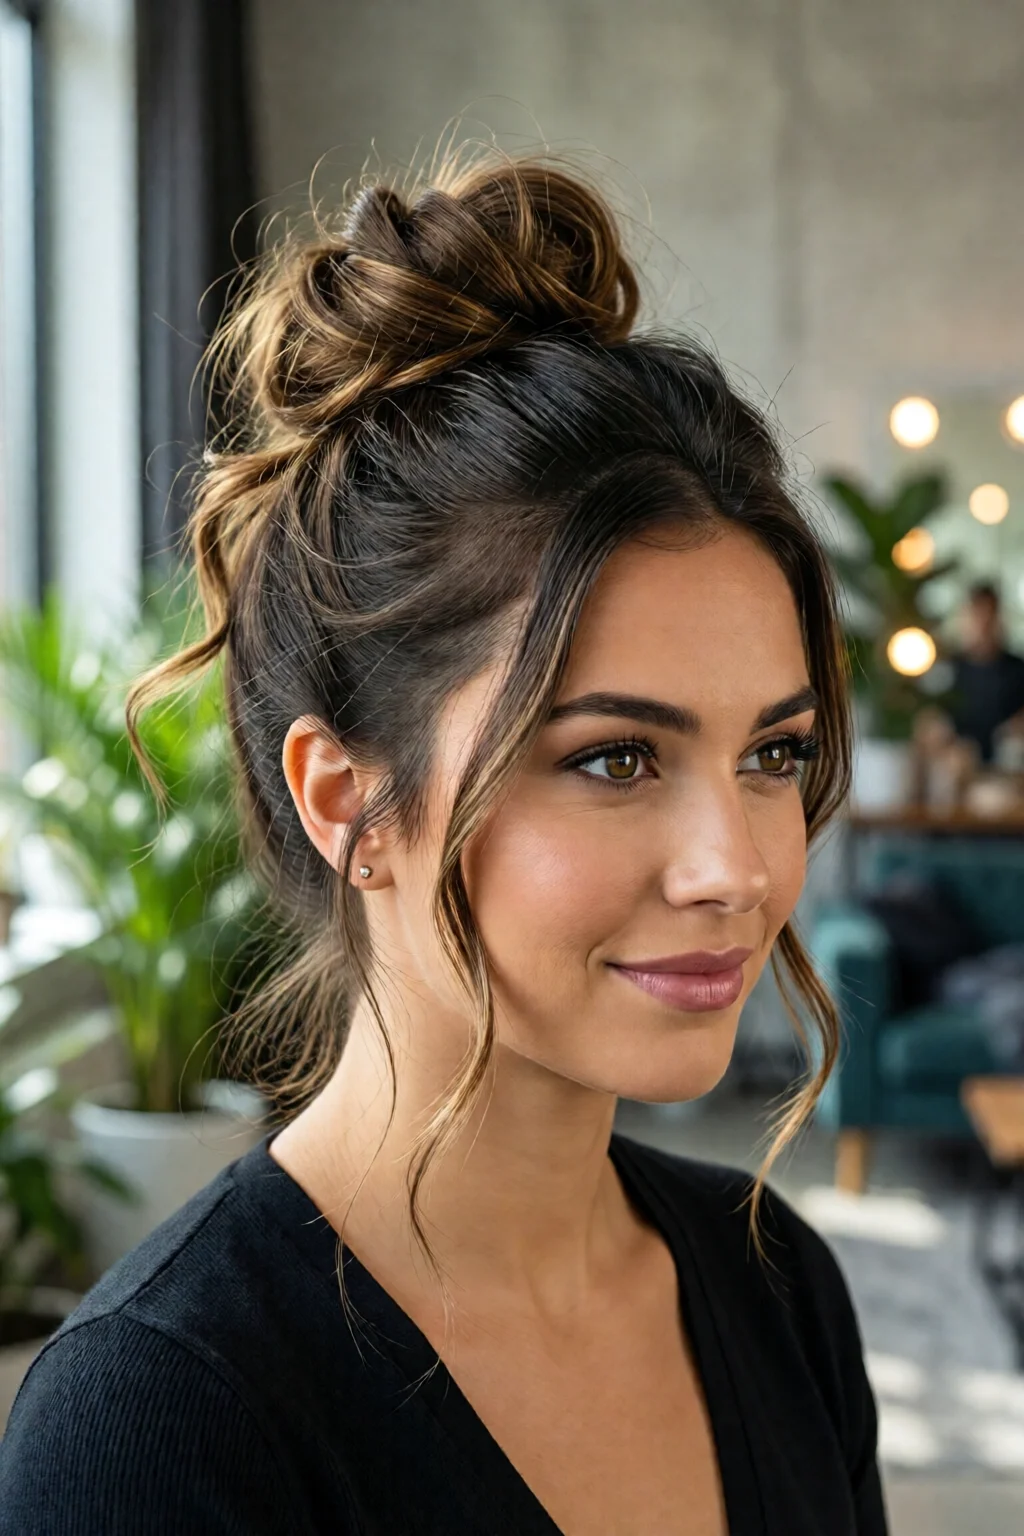
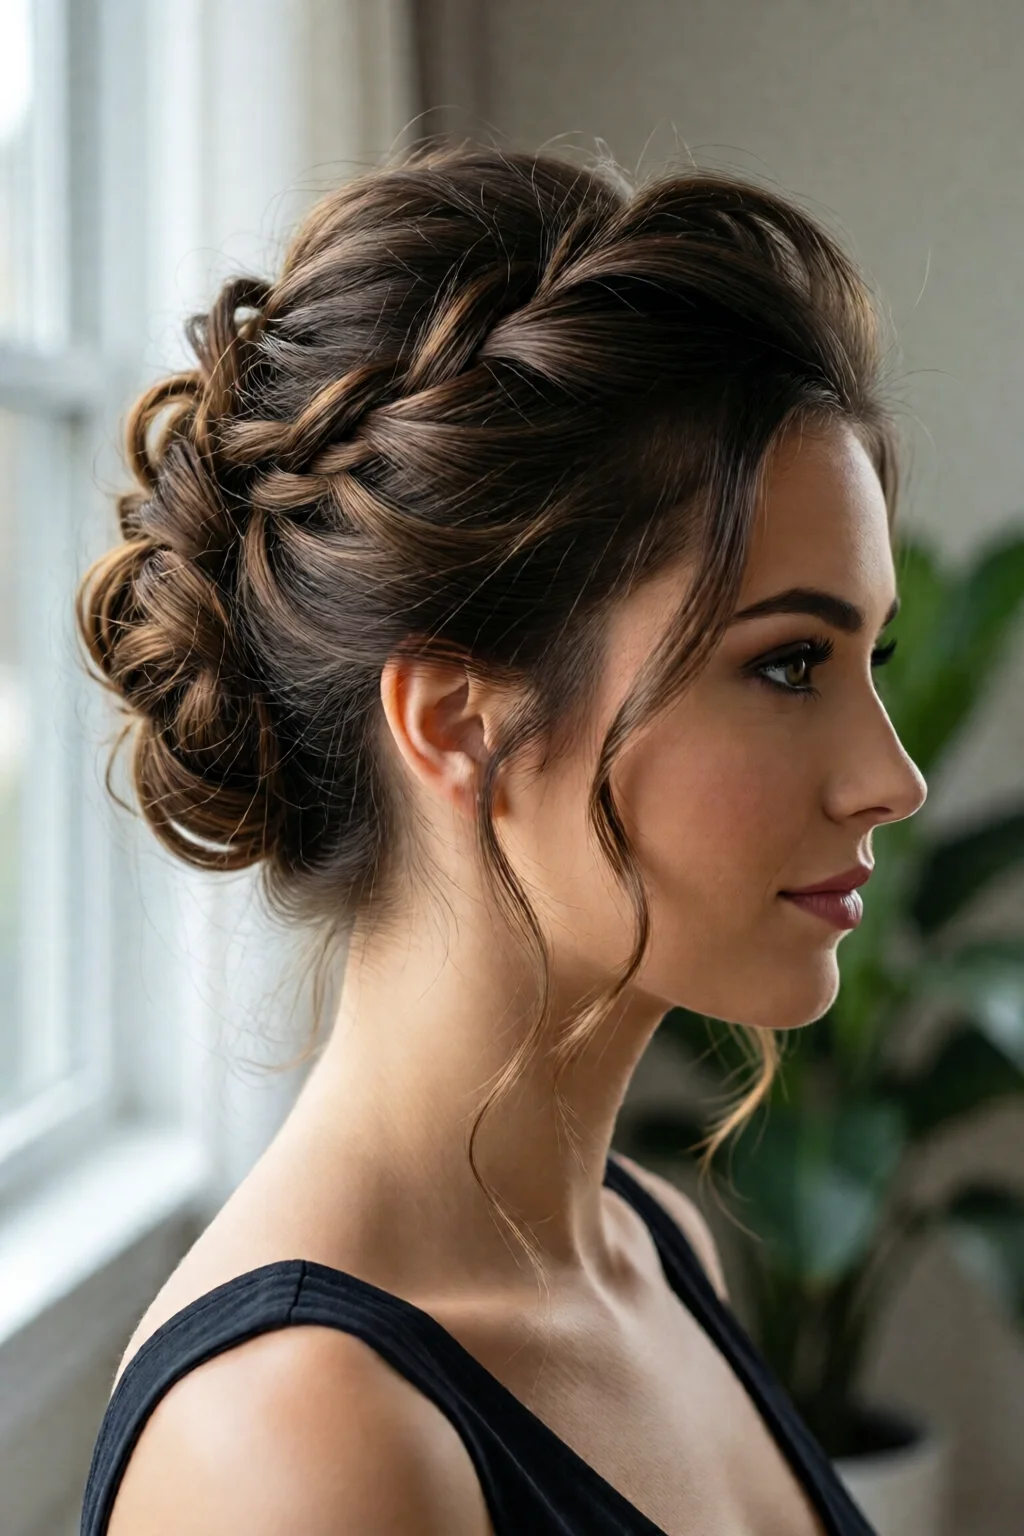
Step 4: Refine the Updo and Add Finishing Touches
With the core structure locked, it’s time to perfect the silhouette. Pull the top twists gently outward to create a soft, feathered edge – think of a “half‑up, half‑down” vibe but fully up. Insert 3‑4 invisible pins along the side edges to anchor the loosened loops.
Spritz Oribe Gold Lust Dry Shampoo (or any medium‑hold finishing spray) from a distance of 12 inches. This adds texture and up to 8‑hour hold without a crunchy feel. For a glossier finish, lightly run a flat iron over the visible twists for 1‑2 seconds; the heat seals the shape while preserving the twist’s definition.
If you want extra sparkle, slide a pearl‑studded hair comb through the center of the updo and press it lightly against the scalp. The comb stays hidden but catches light, giving the illusion of a built‑in hair accessory.
Common Mistakes to Avoid
- Skipping the moisture step. Dry hair resists twisting and breaks easily. Always start with damp hair or a light mist.
- Using overly tight elastics. They can dent the hair shaft and create a “crunchy” look. A medium‑tight 1‑inch elastic is ideal.
- Neglecting to secure the lower band. The updo will sag within minutes if the base isn’t wrapped.
- Over‑twisting the crown. Too many twists cause bulkiness, especially on fine hair. Aim for 2‑3 twists per inch of crown width.
- Applying too much product. Heavy sprays weigh the hair down and make the updo look greasy. One light mist is enough.
Troubleshooting & Tips for Best Results
Hair is too slippery? Add a pinch of texturizing powder (e.g., Living Proof Perfect Hair Day Dry Shampoo, $22) to the crown before twisting. The powder creates grip, reducing slippage by up to 40%.
Twists keep falling apart? Clip each twist with a tiny hairpin as you go. It adds only a fraction of a second per twist but increases durability dramatically.
Need more volume? Backcomb the lower half of the crown lightly before you start twisting. Use a fine‑tooth comb and lift at the roots; you’ll gain an extra 0.5‑inch of height.
Short hair adaptation: If your hair is bob‑length, create “micro‑twists” by taking ½‑inch sections. Then, pull the twisted bundle into a low chignon and secure with a decorative claw clip.
Time‑saving hack: Pre‑twist a night before and store the twists in a silk pillowcase. In the morning, simply gather and secure – you’ll shave 15‑20 minutes off the process.
Summary Conclusion
The twisted updo hairstyle tutorial you’ve just read equips you with a step‑by‑step system, the exact tools I rely on, and troubleshooting tips that eliminate common frustrations. Whether you’re prepping for a formal event or adding polish to an everyday look, this method delivers a sleek, long‑lasting updo in under half an hour. Remember: moisture, moderate tension, and strategic pinning are the three pillars of success. Experiment with accessories, and you’ll have a versatile signature style that turns heads every time.
How long does the twisted updo take to complete?
From start to finish the tutorial usually takes 20‑30 minutes, depending on hair length and whether you pre‑twist the night before.
Can I do this updo on curly hair?
Yes. First, apply a curl‑defining cream (e.g., Maui Moisture Curl Quench + Coconut Oil, $9.99) and lightly straighten the sections you plan to twist with a flat iron set to 350°F. Then follow the same steps; the curls will add natural texture to the twists.
What’s the best product for a strong hold without stiffness?
A medium‑hold finishing spray like Oribe Gold Lust Dry Shampoo provides up to 8 hours of hold while keeping the hair flexible and shiny.
Can I adapt this tutorial for short bob hair?
Absolutely. Use smaller, ½‑inch sections to create micro‑twists, then gather them into a low chignon and secure with a decorative claw clip.
How do I prevent the updo from sliding on fine hair?
Apply a light mist of texturizing powder to the crown before twisting and use invisible hairpins to lock each twist. This combination reduces slippage by up to 40%.
1 réflexion au sujet de « How to Twisted Updo Hairstyle Tutorial (Expert Tips) »