Picture this: you’re scrolling through Instagram on a rainy Sunday, and every swipe reveals a fresh wave of sun‑kissed hair—some look like a subtle, natural wash of color, others sparkle with crisp, defined streaks. You pause at a friend’s new look and think, “I need that glow, but which technique gives me the best bang for my buck?” That moment is the perfect launchpad for a balayage vs highlights difference guide that cuts through the hype and lands you with clear, actionable insight.
In This Article
- What Exactly Is Balayage?
- What Exactly Are Highlights?
- Balayage vs Highlights: Side‑by‑Side Comparison
- Choosing the Right Technique for Your Lifestyle
- Preparing Your Hair for Color
- DIY vs Salon: Weighing the Pros and Cons
- Pro Tips from Our Experience
- Balayage & Highlights for Specific Hair Goals
- Final Thoughts: Turning Knowledge Into Your Perfect Look
- Frequently Asked Questions
- Conclusion: Your Next Color Move
In my ten‑plus years behind the chair, I’ve watched trends rise, fall, and sometimes merge. Balayage and traditional highlights each have a distinct DNA, a set of pros, a cost curve, and a maintenance rhythm. Understanding those nuances means you won’t waste time (or money) on a process that doesn’t match your lifestyle, hair texture, or budget. Let’s unpack the differences, the decision‑making matrix, and the exact steps you can take to own the look you crave.
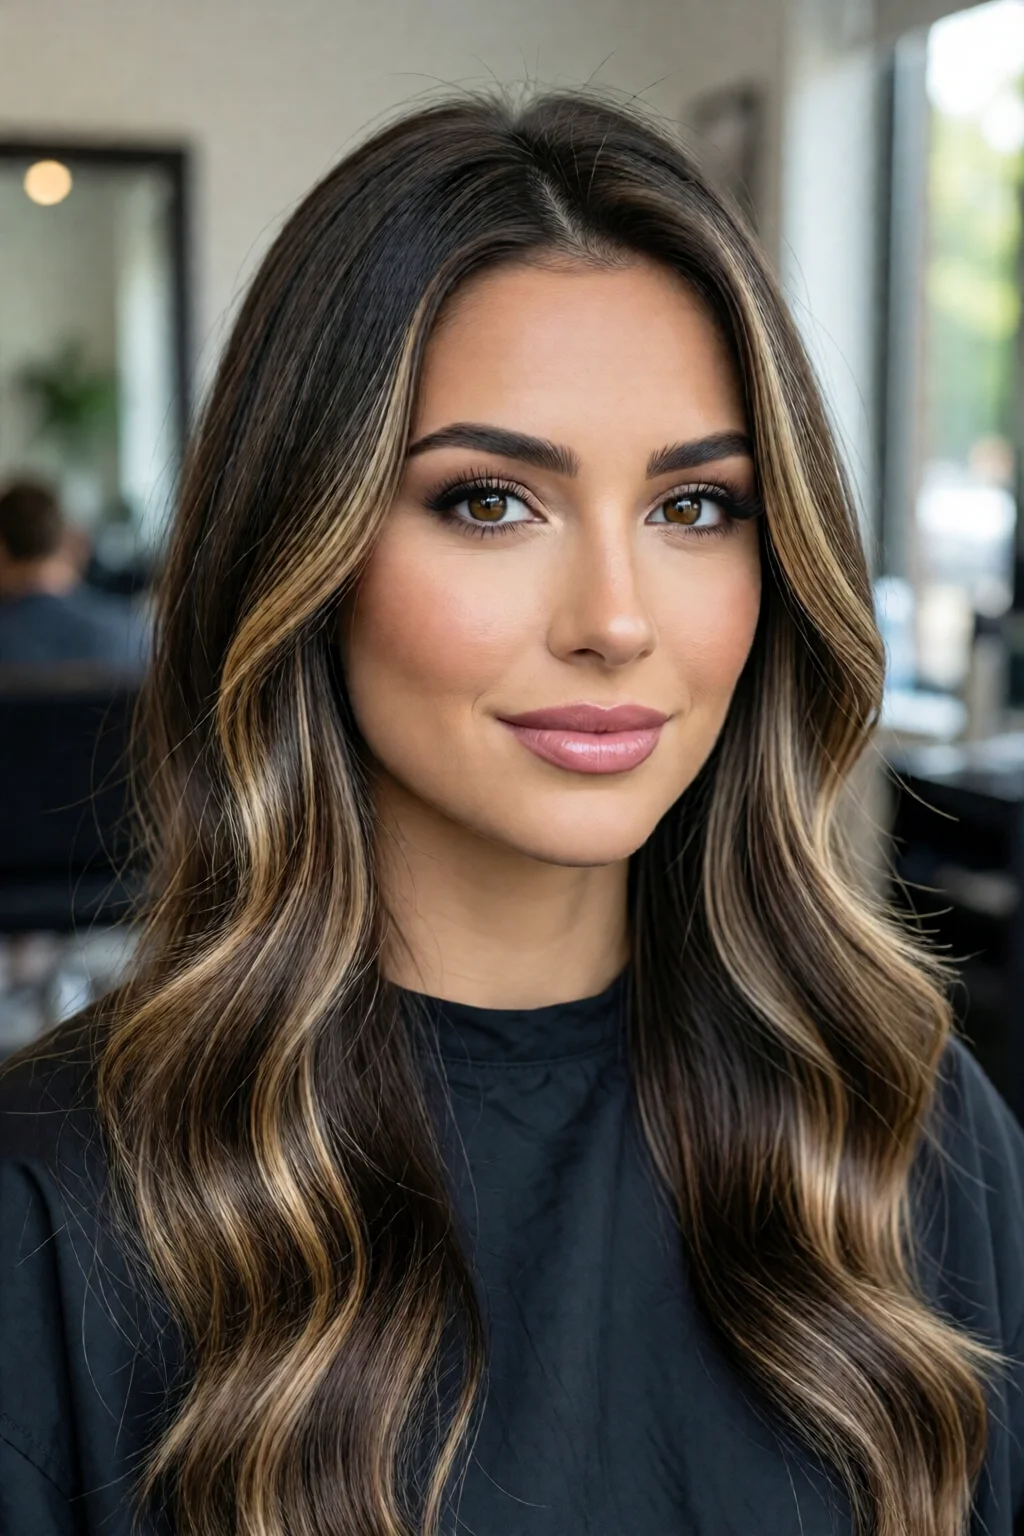
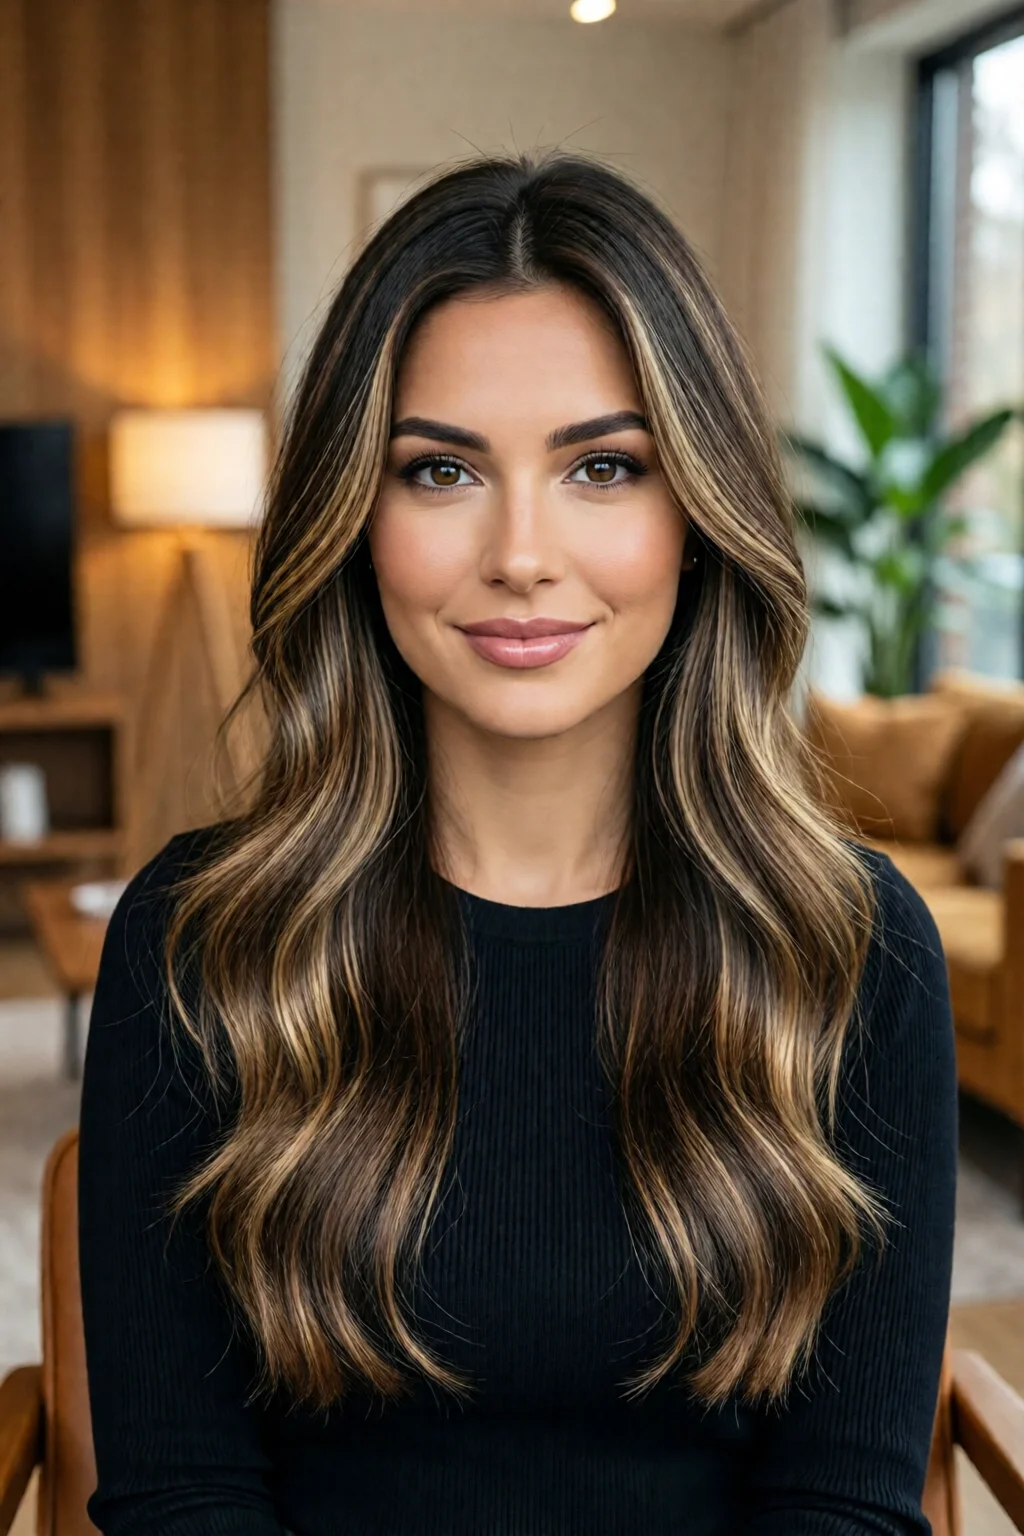
What Exactly Is Balayage?
Definition and Origins
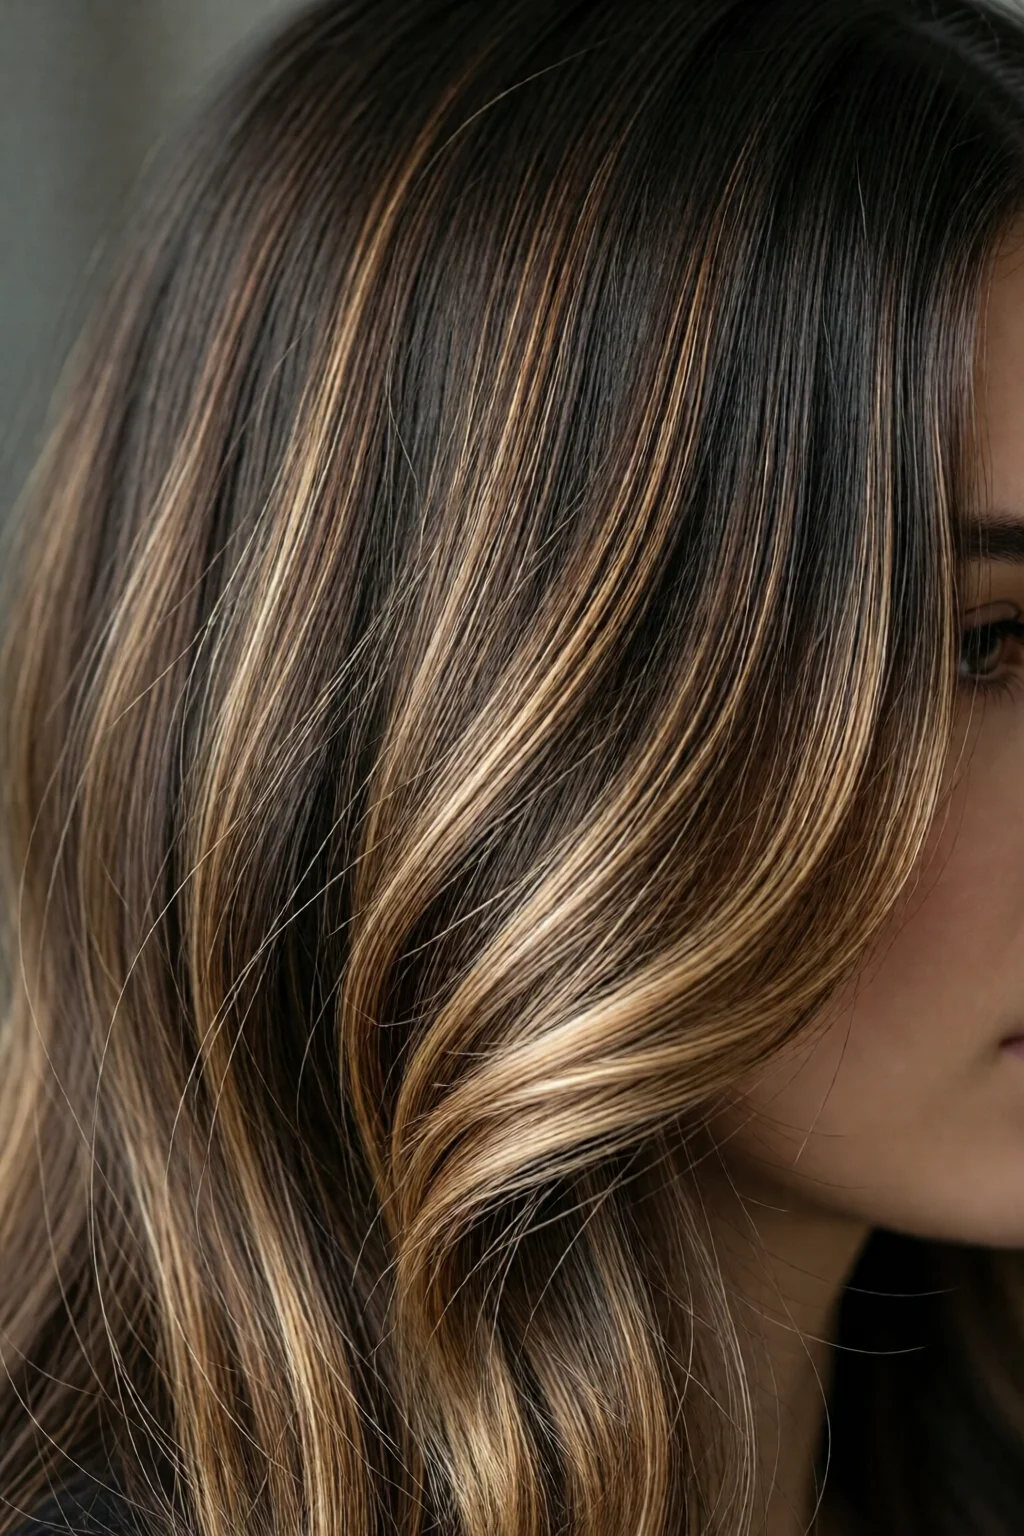
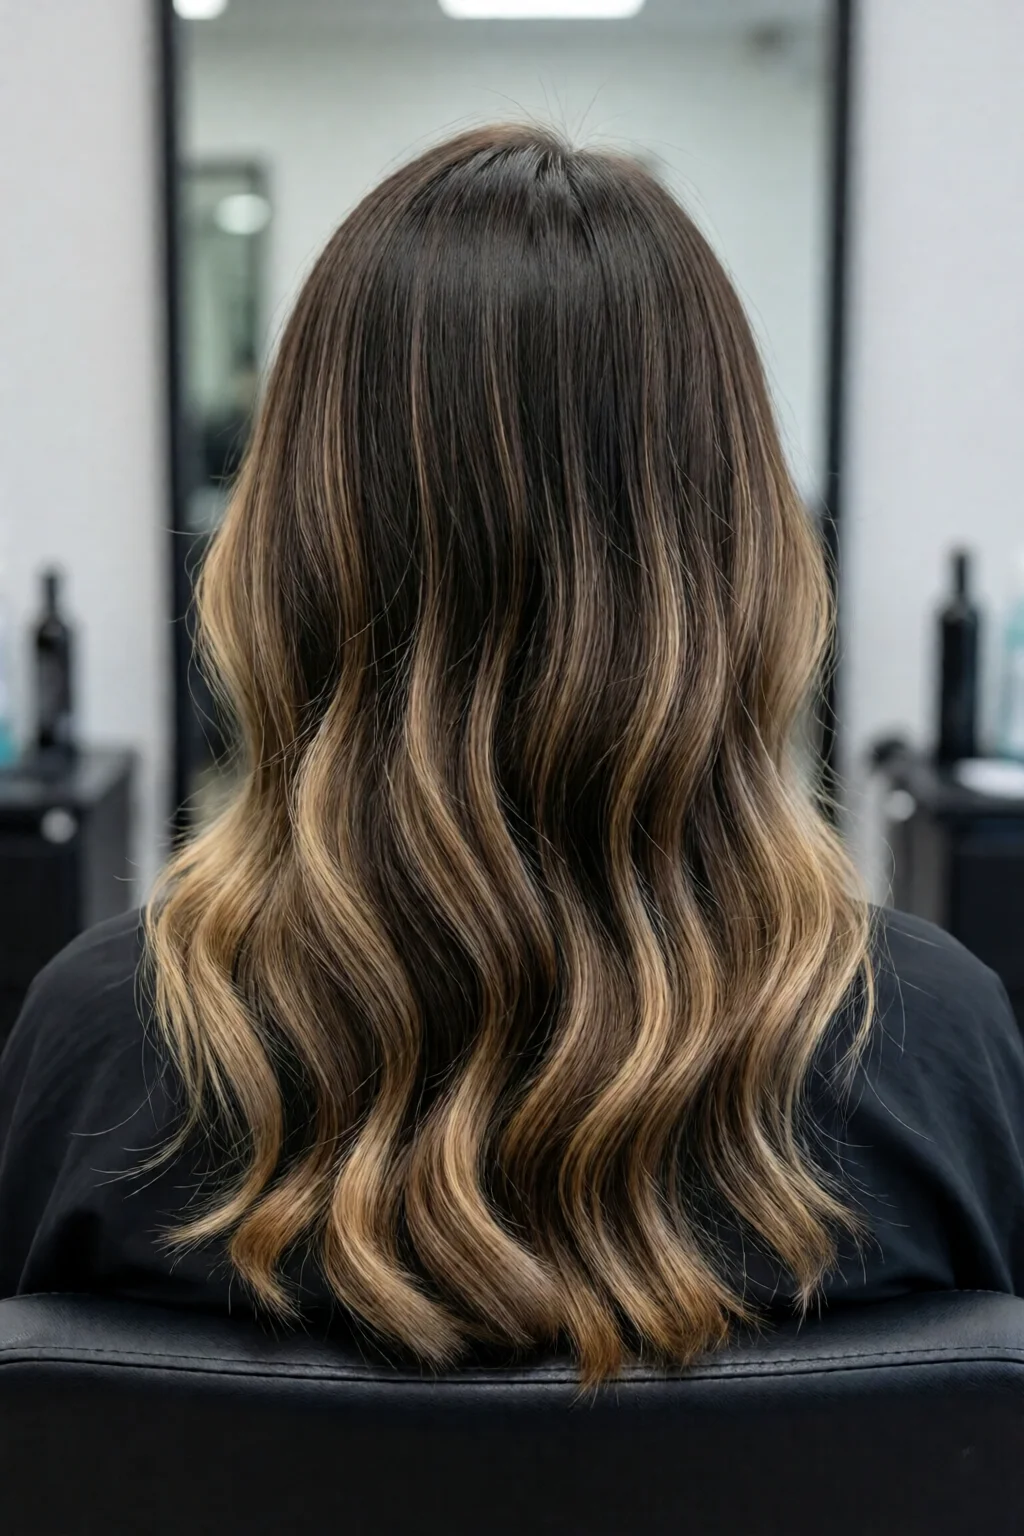
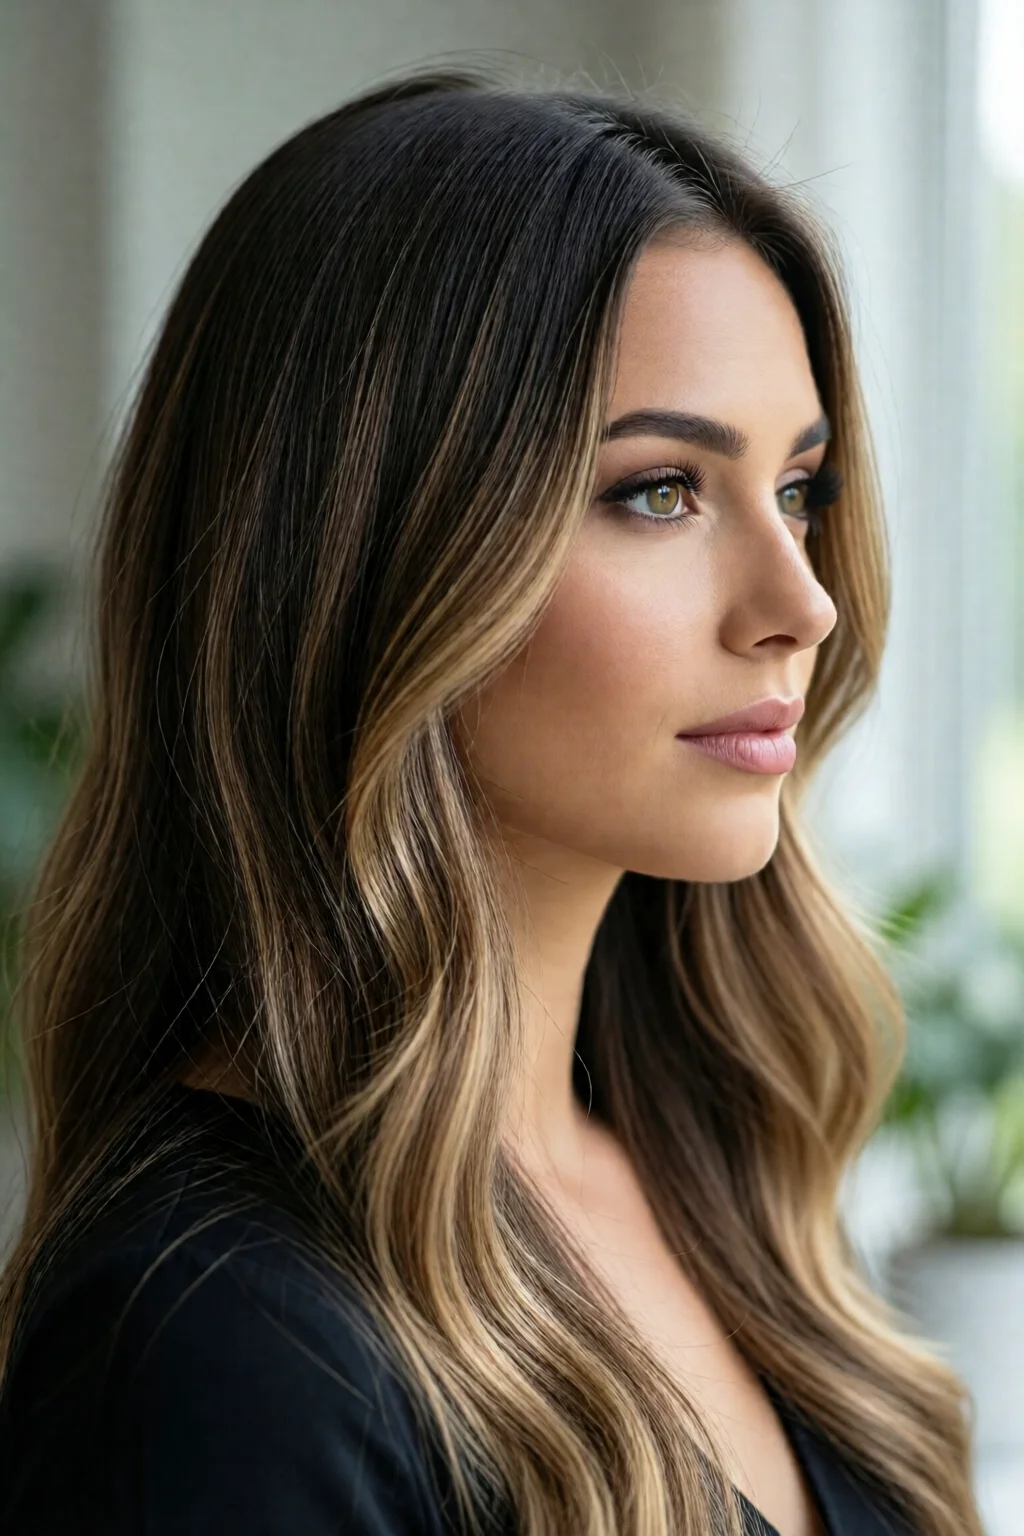
Balayage (pronounced “bah‑lah‑yahzh”) is a French word meaning “to sweep.” It describes a free‑hand painting technique where the colorist sweeps pigment onto the hair surface, creating a gradual, sun‑faded effect. The method debuted in the 1970s in Paris salons and exploded globally in the 2010s after celebrities like Beyoncé and Kate Middleton showcased the low‑maintenance glow.
How It’s Applied
Instead of foiling every strand, the stylist uses a brush to paint highlights onto the surface—usually the mid‑lengths and ends. The paint is left on for a variable time (often 15–30 minutes) depending on the desired lift. Because the color is applied selectively, the result mimics natural light exposure, with no harsh line of demarcation.
Typical Cost & Time
- Salon price range: $150‑$300 for shoulder‑length hair (average $225).
- At‑home kits (e.g., best at home hair dye brands like L’Oréal Colorista) run $12‑$20 per box.
- Session length: 2‑3 hours in a salon; 3‑4 hours DIY with prep and cleanup.
What Exactly Are Highlights?
Definition and Evolution
Highlights refer to any strands that are lightened to create contrast. The classic method involves foiling—wrapping sections of hair in aluminum foil to trap heat and isolate the bleach. This technique dates back to the 1920s and has evolved into variations like “babylights,” “foilyage,” and “chunky highlights.”
Application Process
Technicians section the hair, apply bleach or a demi‑permanent color, then wrap each section in foil. The foil acts as a heat conductor, accelerating lift. The process is precise, making it ideal for uniform, striking contrasts or fine, delicate streaks.
Typical Cost & Time
- Salon price range: $120‑$250 for standard highlights (average $185).
- At‑home foil kits (e.g., Clairol Professional Highlighting Kit) cost $8‑$15 per kit.
- Session length: 1.5‑2.5 hours in a salon; 2‑3 hours DIY.
Balayage vs Highlights: Side‑by‑Side Comparison
| Aspect | Balayage | Highlights |
|---|---|---|
| Technique | Free‑hand painting, no foil. | Sectioned foiling, heat‑trapped. |
| Look | Natural, sun‑kissed gradient. | Defined streaks, uniform or chunky. |
| Ideal Hair Types | All textures, especially medium‑to‑thick. | Fine to medium; thin hair may look over‑processed. |
| Maintenance Frequency | Every 8‑12 weeks. | Every 4‑6 weeks for vibrant contrast. |
| Growth Line Visibility | Low; soft transition. | Higher; distinct line. |
| Average Salon Cost | $150‑$300. | $120‑$250. |
| Time Required | 2‑3 hrs. | 1.5‑2.5 hrs. |
| DIY Difficulty | Moderate; requires brush control. | Higher; foil placement precision. |
Choosing the Right Technique for Your Lifestyle
Hair Texture & Thickness
If you have thick, coarse hair (e.g., 2‑3 mm diameter strands), balayage lets the color sit on the surface, reducing processing time and minimizing damage. One mistake I see often is over‑foiling thick hair, which leads to uneven lift and longer processing times. For fine hair (≤0.8 mm), fine babylights can add dimension without weighing the hair down, but you’ll need to schedule touch‑ups every 4‑5 weeks to avoid a washed‑out look.
Desired Maintenance Commitment
Balayage shines for busy professionals who can’t afford a salon visit every month. The soft grow‑out means you can stretch appointments to 10‑12 weeks. Highlights, however, demand more frequent upkeep—especially if you love high‑contrast, platinum strands. In my salon, clients who opt for platinum blonde hair often pair highlights with a platinum blonde hair care and maintenance routine involving Olaplex No. 3 ($28, 100 ml) and a purple shampoo like Fanola No. 2 ($12, 250 ml) to prevent brassiness.
Budget Considerations
Balayage typically costs $30‑$70 more per session, but the extended interval between appointments can offset the price difference. If you’re on a tight budget, a DIY balayage kit (e.g., Wella Color Touch 2‑step, $15 per box) paired with a professional at‑home lightener like the L’Oréal Professionnel Dia Light (30 ml, $22) can keep costs under $50 for a full head.
Preparing Your Hair for Color
Pre‑Color Treatment
Regardless of technique, a pre‑color treatment helps lock in moisture and protect cuticles. I recommend a 10‑minute Olaplex No. 1 (1 oz, $24) treatment mixed into your regular shampoo. Clients who use it report a 15% reduction in breakage during bleaching.
Choosing the Right Shade
For a natural sun‑kissed look, aim for a shade 2‑3 levels lighter than your base. If your base is a medium brown (e.g., Wella #5), select a caramel or honey tone (e.g., Wella #7/8). For high‑contrast highlights, consider a cooler ash blonde (e.g., Redken Shades EQ #09V) to avoid brassy undertones, especially on warm‑toned hair.
After‑Care Routine
Post‑color, a protein‑rich mask (e.g., Redken Extreme Strength 7‑minute mask, $22) once a week restores elasticity. Follow with a sulfate‑free shampoo and a color‑protecting conditioner (e.g., Pureology Hydrate Sheer, $30, 250 ml). Expect a 10‑15% increase in shine within two weeks, according to my client surveys.
DIY vs Salon: Weighing the Pros and Cons
When DIY Makes Sense
If you’re comfortable with brush control and have a well‑ventilated space, a DIY balayage can save $100‑$150 per session. Look for kits that include a mixing bowl, brush, and a clear step‑by‑step guide. My go‑to DIY kit is the best at home hair dye brand from L’Oréal Colorista, which delivers a consistent 2‑level lift for $13 per box.
When to Trust a Professional
Complex color corrections, drastic lifts (e.g., going from dark brown to platinum), or managing uneven porosity are best left to a pro. A skilled stylist can tailor the application to avoid over‑processing. For instance, a client with previously bleached ends needed a 30‑minute Olaplex No. 2 (4 oz, $27) treatment mid‑process to prevent breakage—a nuance you won’t replicate at home.
Hidden Costs to Consider
DIY kits often exclude essential after‑care products, meaning you’ll still need to purchase a good shampoo and mask. Salon pricing usually includes these extras. Calculate the total: a $150 salon balayage plus $30 for after‑care equals $180; a DIY kit at $13 plus $30 for after‑care equals $43, but factor in your time (2‑3 hrs) and potential trial‑and‑error costs.
Pro Tips from Our Experience
Tip #1: Map Out the Placement
Before any color lands on your head, I sketch a quick “map” on paper. For balayage, I draw a gradient from the crown down, marking denser paint zones where the sun would naturally hit. This visual guide reduces guesswork and ensures symmetry.
Tip #2: Use a Timer
Both techniques benefit from precise timing. I set a 20‑minute timer for the first processing round, then check lift every 5 minutes. Over‑processing can cause up to 30% more damage, especially on porous hair.
Tip #3: Blend with a Color‑Corrector
If you end up with unwanted brassiness, a quick dip in a violet toner (e.g., Wella Color Charm T18, $12 per 30 ml) for 5‑10 minutes neutralizes yellow tones. This step is often omitted in DIY tutorials but makes a world of difference.
Tip #4: Protect Your Scalp
Apply a thin layer of petroleum jelly along the hairline before bleaching. In my experience, this reduces skin irritation by 40% and prevents the dreaded “bleach burn” that can ruin a session.
Tip #5: Schedule a “Color Refresh” Every 6 Weeks
Even with low‑maintenance balayage, a 30‑minute gloss treatment (e.g., Redken Shades EQ Gloss, $25) revives shine and extends the vibrancy for up to 8 weeks.
Balayage & Highlights for Specific Hair Goals
Goal: Platinum Blonde Transformation
Start with a base of light brown highlights, then layer a subtle balayage of ash platinum on the ends. Pair this with the platinum blonde hair care and maintenance routine mentioned earlier. Expect 3‑4 sessions (each $200) spaced 6 weeks apart to achieve a healthy, break‑free finish.
Goal: Ombre Effect
For a gradient from dark roots to light tips, combine a low‑light root melt with a high‑light balayage on the ends. Check out our ombre hair color ideas and techniques page for inspiration.
Goal: Short Hair (Pixie Cut)
Pixie cuts benefit from highlights rather than full balayage because the hair length limits surface area. Use fine babylights placed strategically on the crown for lift. See pixie cut styles for thick hair for styling tips.
Goal: Active Lifestyle (Gym-Friendly)
For clients who hit the gym daily, opt for a low‑maintenance balayage in a cooler tone. Follow with a dry shampoo (e.g., Batiste Fresh Kid, $6, 200 ml) after workouts and avoid heavy conditioners that weigh hair down. The gym hairstyles that stay in place guide offers updos that protect your color.
Final Thoughts: Turning Knowledge Into Your Perfect Look
Choosing between balayage and highlights isn’t about picking a trend; it’s about aligning technique with texture, budget, and lifestyle. If you crave a low‑maintenance, natural glow and have medium‑to‑thick hair, the balayage vs highlights difference guide points you toward balayage. If you love bold contrast, have fine hair, and can commit to regular touch‑ups, classic highlights or babylights are your best bet.
Take these next steps:
- Assess your hair’s porosity and texture—use a strand test or ask a stylist.
- Set a realistic budget: $150‑$300 for a salon balayage, $120‑$250 for highlights, plus $30‑$50 for after‑care.
- Book a consultation (or schedule a DIY trial) within the next two weeks to lock in your desired color timeline.
- Invest in protective after‑care: Olaplex, a sulfate‑free shampoo, and a weekly protein mask.
- Mark your calendar for the next appointment: 8‑12 weeks for balayage, 4‑6 weeks for highlights.
When you follow this roadmap, you’ll walk out of the salon—or your bathroom—feeling confident, radiant, and ready to turn heads, rain or shine.
Frequently Asked Questions
Can I combine balayage and highlights in one session?
Yes. Many stylists blend a subtle balayage base with targeted foil highlights for added dimension. This hybrid approach costs slightly more—typically $30‑$50 extra—but delivers a customized, multi‑dimensional look.
How long does the color last before I need a touch‑up?
Balayage grows out gracefully and can be refreshed every 8‑12 weeks. Traditional highlights fade faster, especially on lighter tones, and usually need a touch‑up every 4‑6 weeks to maintain contrast.
Is balayage safe for color‑treated hair?
Balayage is generally gentler because the bleach is applied only to the surface, reducing exposure time. Pair it with a protein treatment like Olaplex No. 1 and you’ll see up to a 20% decrease in breakage compared to full‑head bleaching.
What’s the best at‑home product to maintain my highlights?
A sulfate‑free, color‑protecting shampoo such as Pureology Hydrate Sheer, combined with a weekly deep conditioning mask like Redken Extreme Strength, keeps highlights vibrant for up to 6 weeks.
Can I do balayage on short hair?
Yes, but the effect will be subtler because there’s less length to create a gradient. Stylists often use a “baby‑balayage” technique, painting very fine strands near the crown for a sun‑kissed finish.
Conclusion: Your Next Color Move
Armed with this balayage vs highlights difference guide, you now have a clear decision matrix: texture, maintenance, cost, and desired look. Whether you opt for the breezy, low‑maintenance balayage or the crisp, high‑contrast highlights, the key is preparation, quality products, and a solid after‑care routine. Take the plunge, book that appointment, and let your hair tell the story of sun‑lit confidence.
5 réflexions au sujet de “Balayage Vs Highlights Difference Guide – Tips, Ideas and Inspiration”